Follow the steps below to publish your website in 20 minutes!!
The reason behind this page is to enable people publish their own website without much hassle. It does not involve paying someone regularly and you get access and control ovef everything.
Requirements
- You mush have your own HTML/CSS/JS code ready for your website
- A payment method for your website
STEP 1: Setting up Github Pages
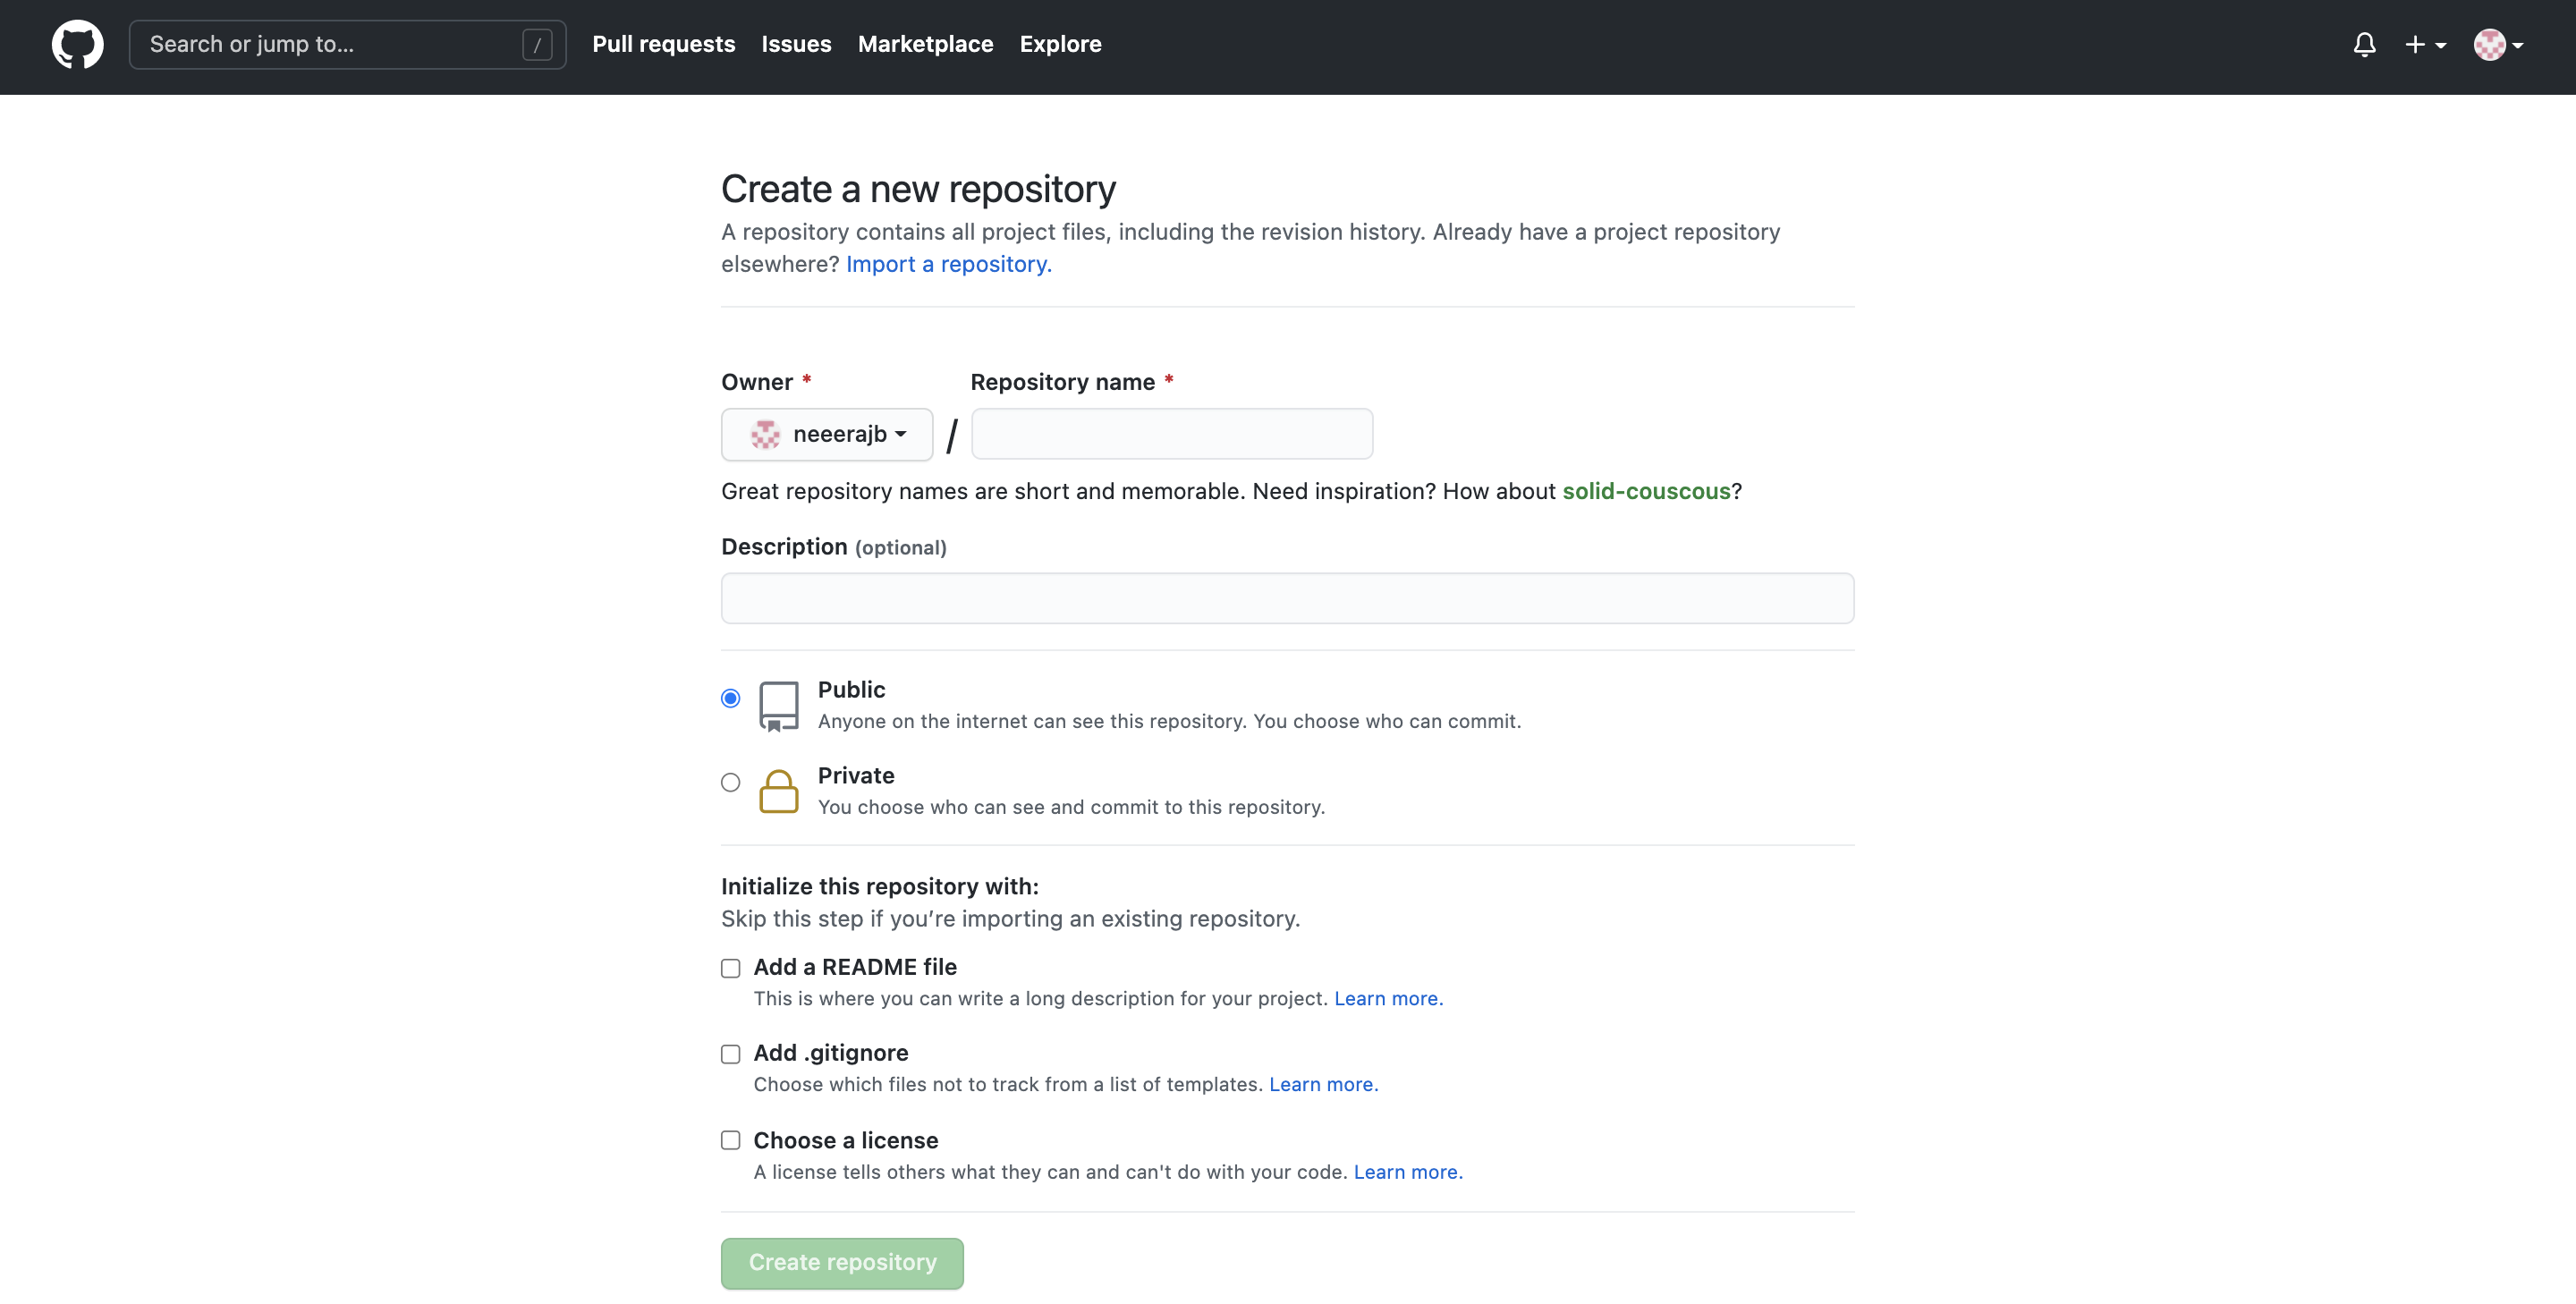
- Create a Github account.
- Make a new Repository (I suggest to use the same name as your username, for eg. neeerajb in my case)
- Upload all your files. Make sure they are not inside a folder and you have your main "index.html" file outside.
- Add another extra file named "CNAME" (without any extension) and write your website address(we will buy a domain in the next step).
- Congratulations! Your github pages is good to go. You can check your github page at 'username.github.io' (Mine is neeerajb.github.io).
STEP 2: Buy a Domain
- You can buy a domain from anywhere. I use Gandi.net where it usually costs $20 and you get 2 free emails.
- After you make an account and buy a domain, all we need to do is link the github to our domain via cloudflare.
- We will be adding nameservers at the end of of Step 3.
STEP 3: Integration with Cloudflare
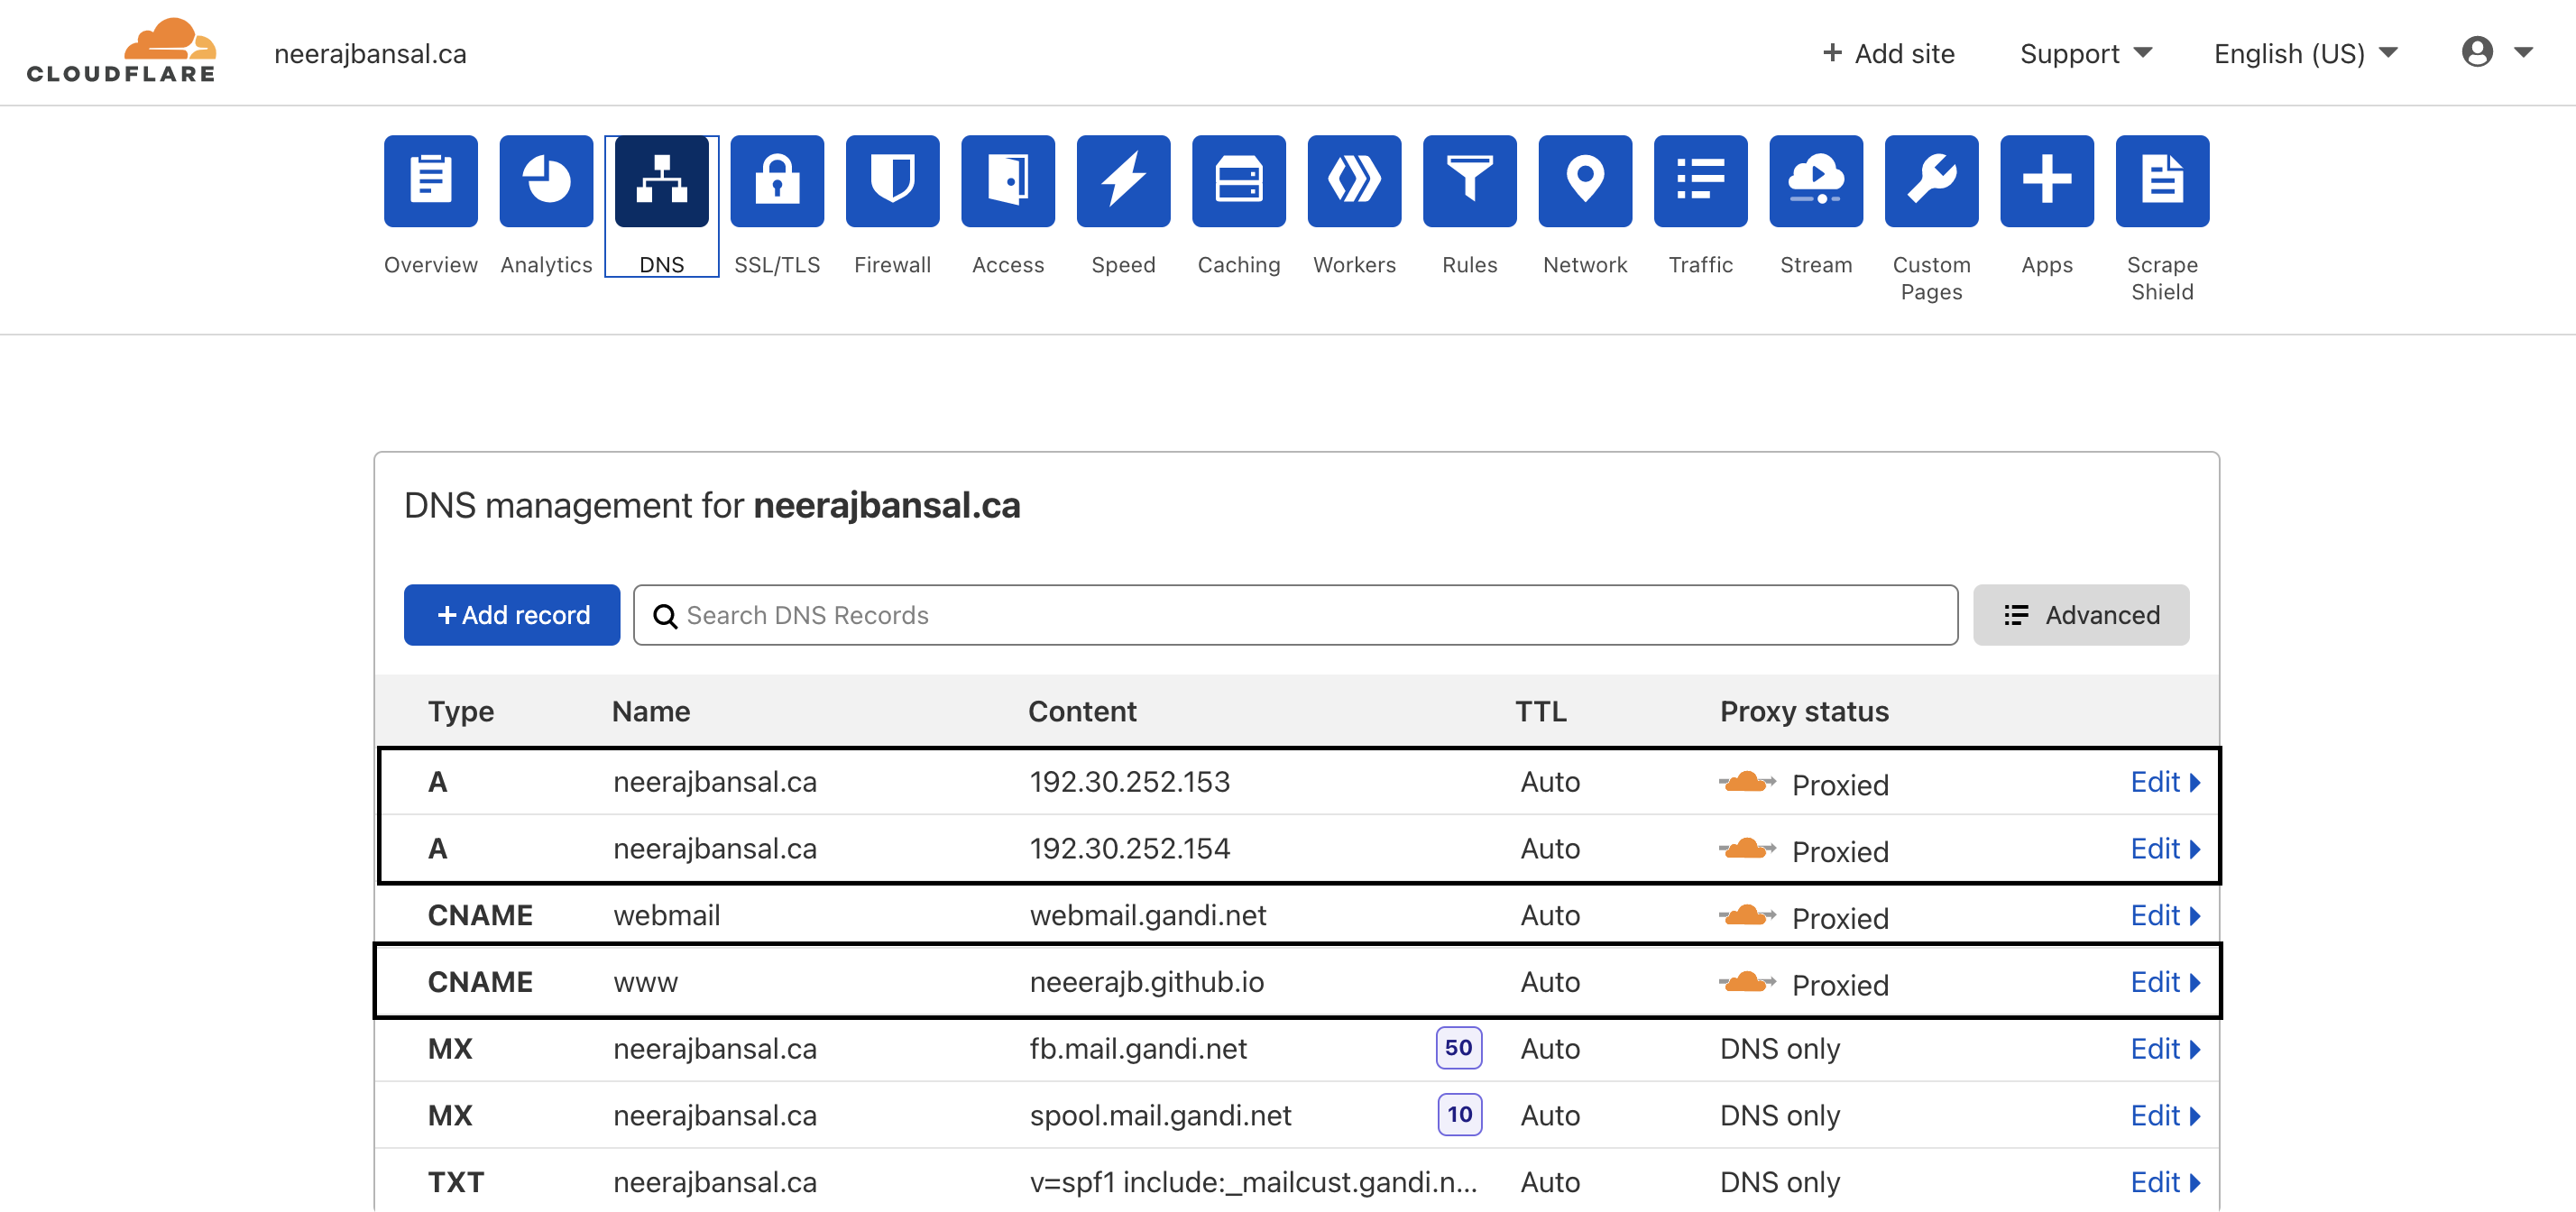
- Create an account on Cloudflare and add your site.
- Click on DNS and add the following 3 rows (1st, 2nd and 4th line) by adding a record.
- Please make sure to replace the name for the first 2 rows with your website name and the content for the 4th row with your github live page.
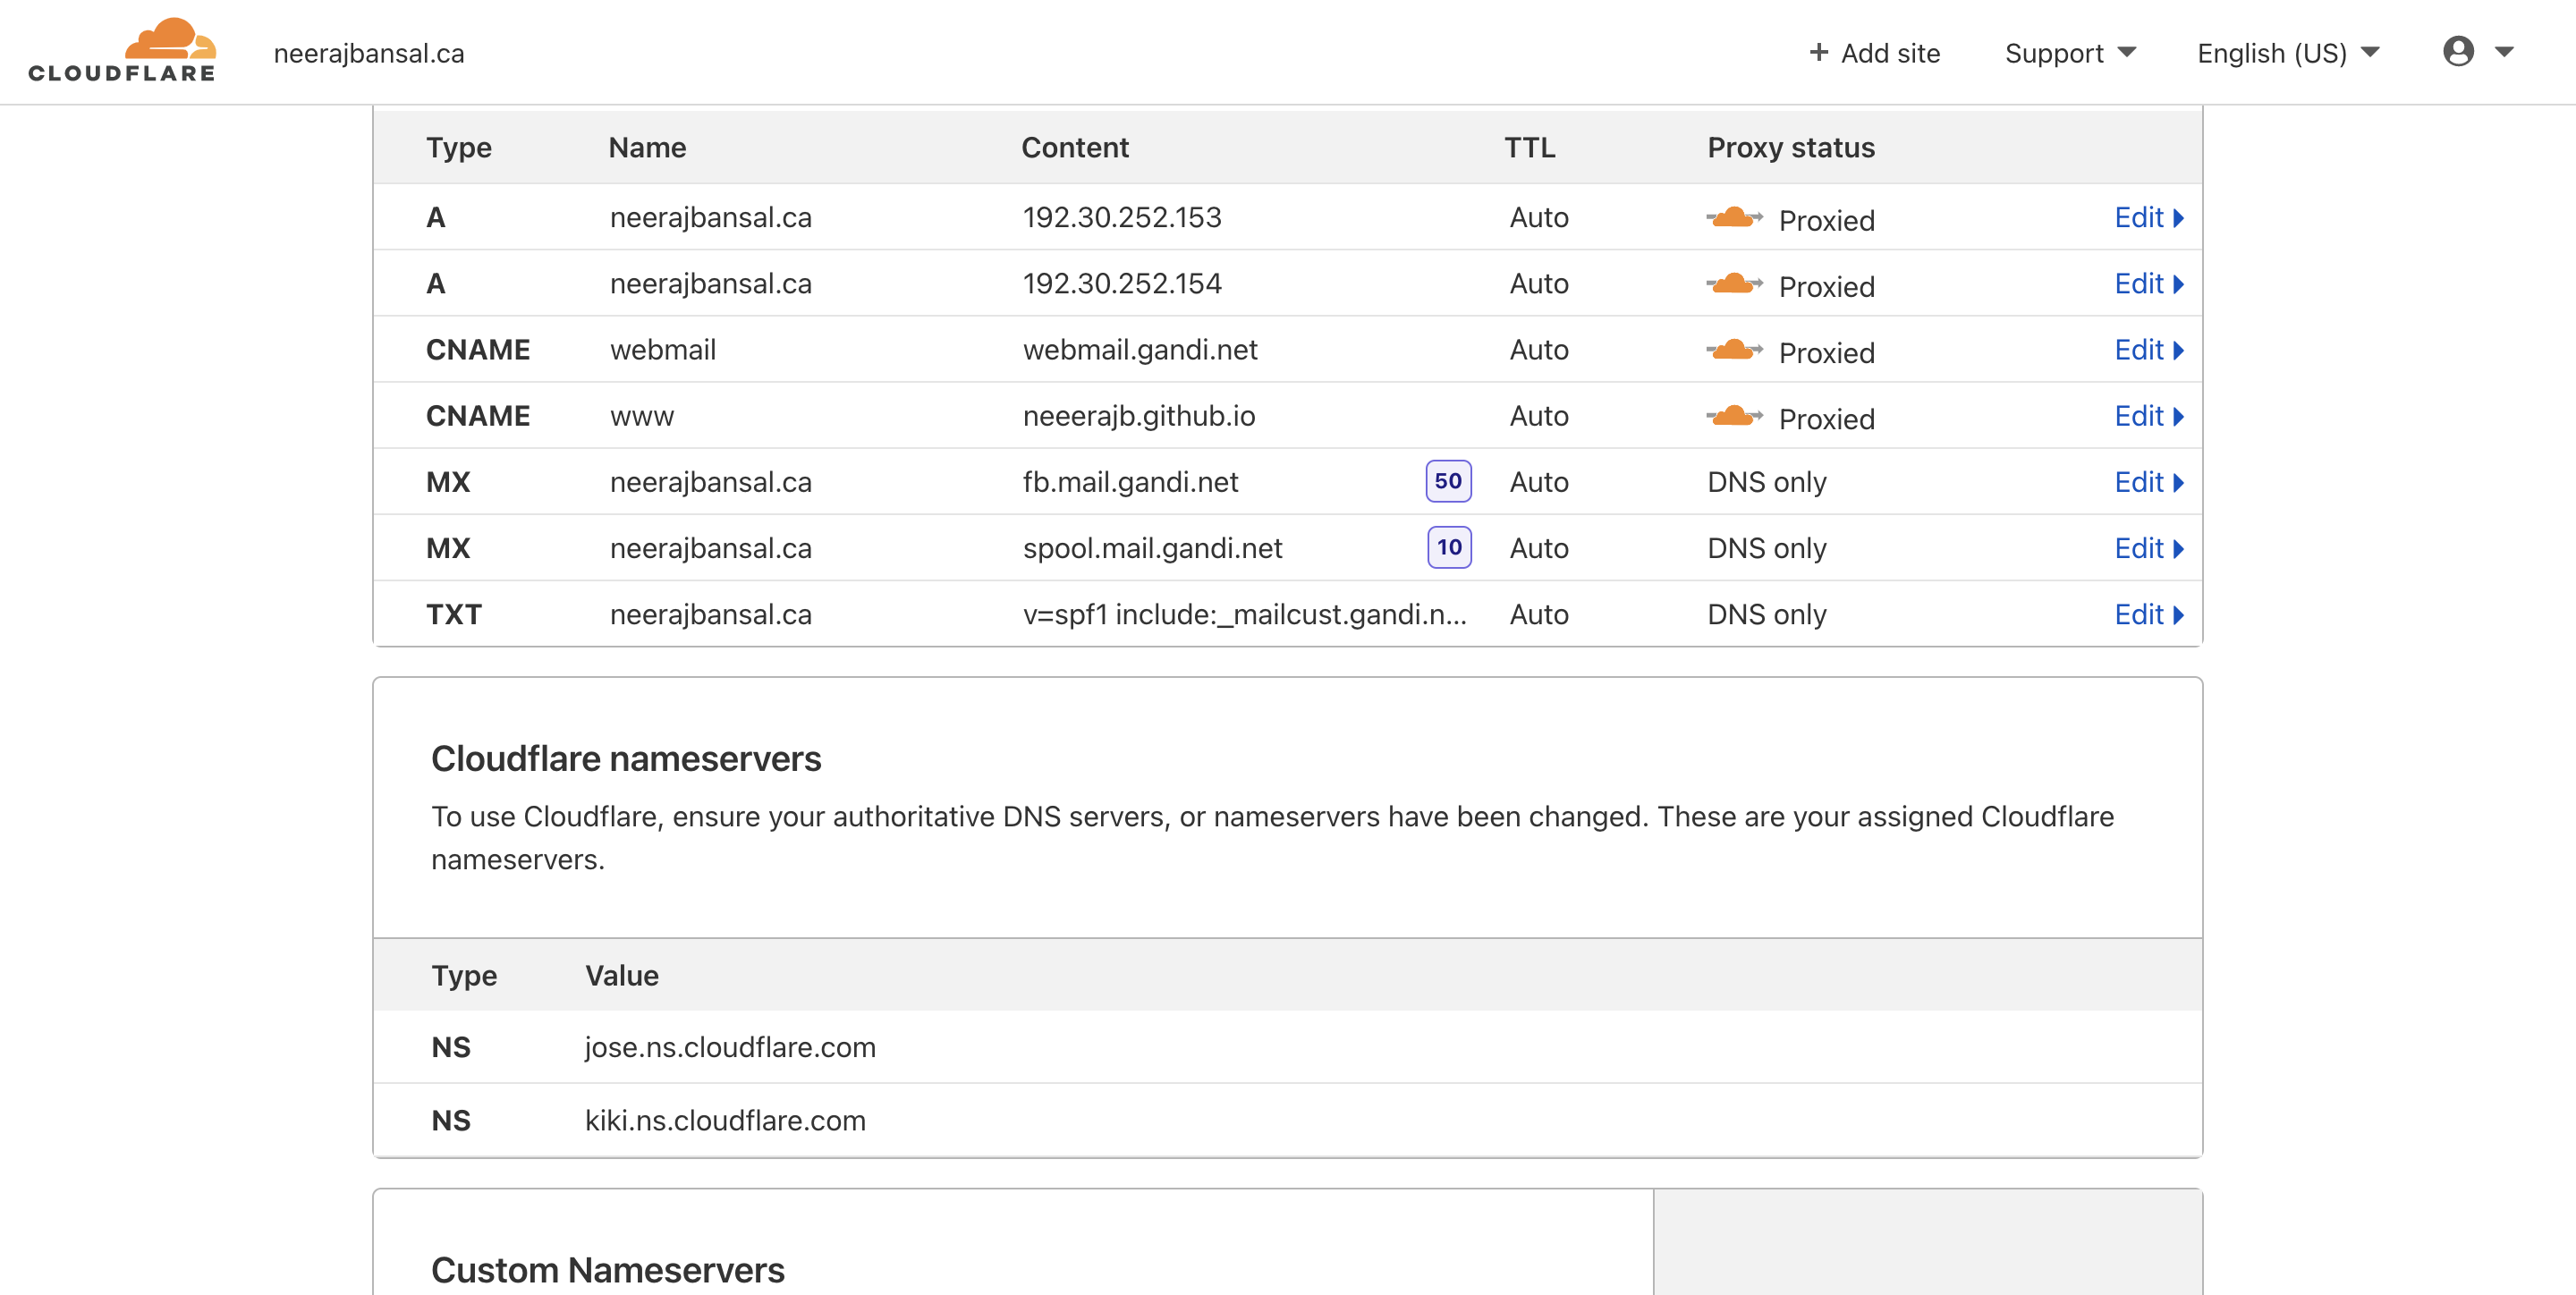
- If you haven't been asked for nameservers yet, in the same DNS tab, you can find your nameservers.
- Go back to your gandi.net account and add your external nameservers there.
- Once the DNS setting and the nameservers are complete, your website should be good to go.
Going one step further
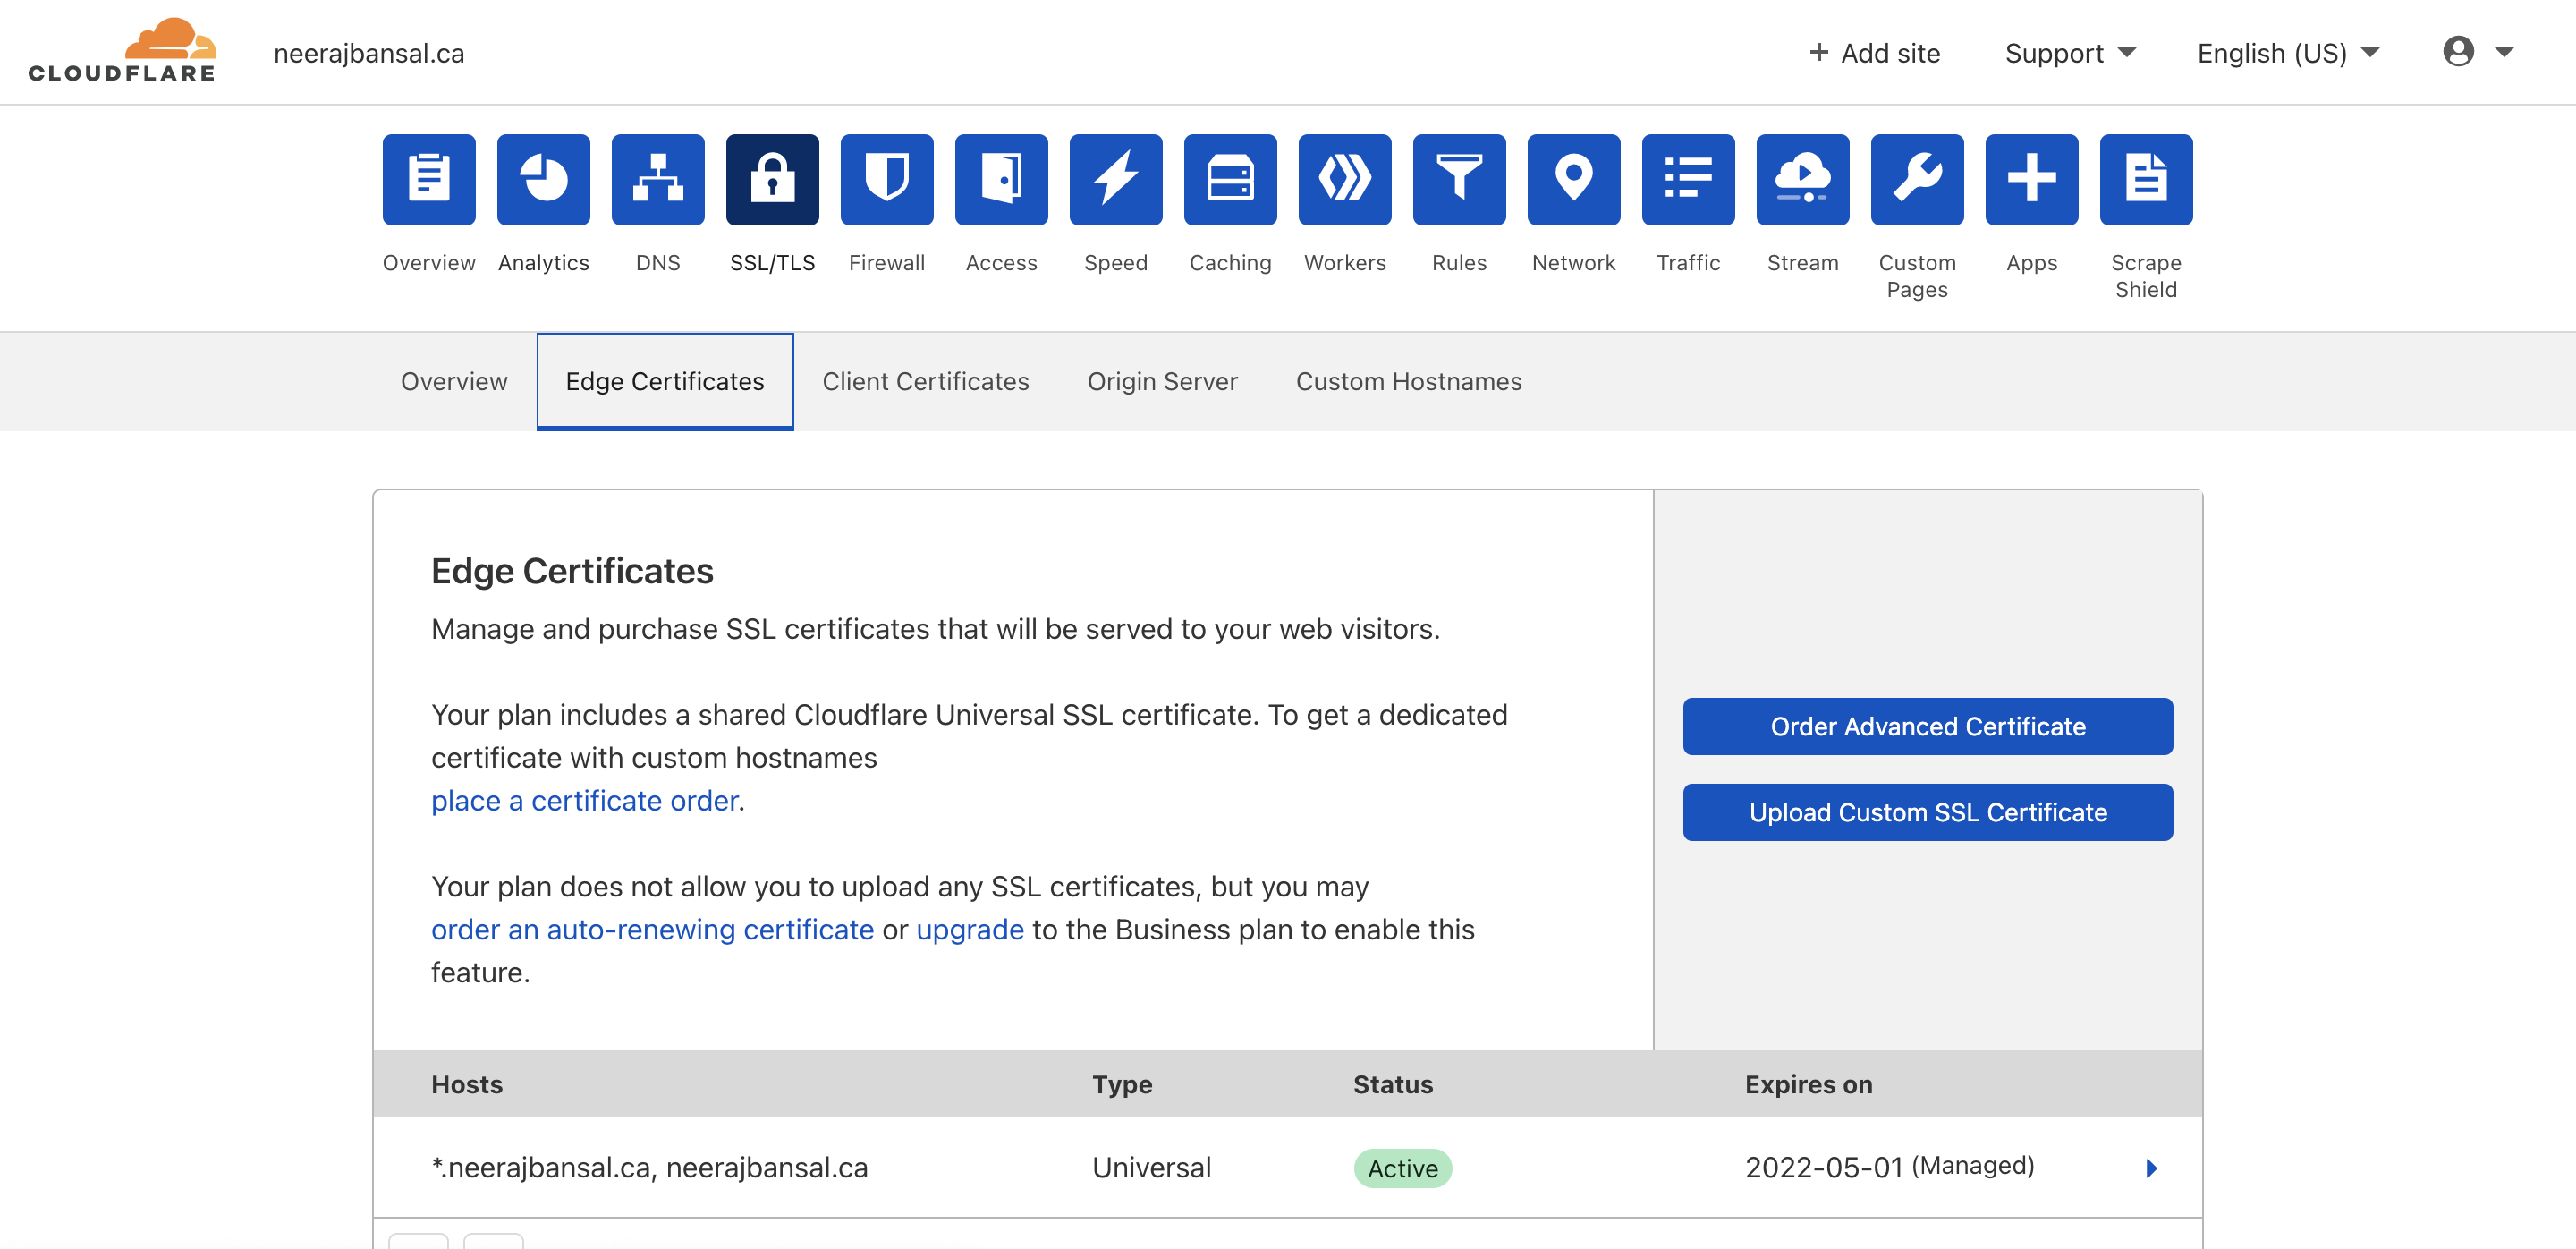
Now your website is live but it doesn't feel secure without the 'https'. For that
- Go to your website in the cloudflare account.
- Under the SSL/TLS tab, go to 'Edge Certificates'.
- Turn ON "Always Use HTTPS" and "Automatic HTTPS Rewrites".